
AI Bald Filter Video: Check the Effect Before Recording
Choose an AI bald filter video workflow, test head turns and beard edges, and check whether the effect records live or edits an existing clip.
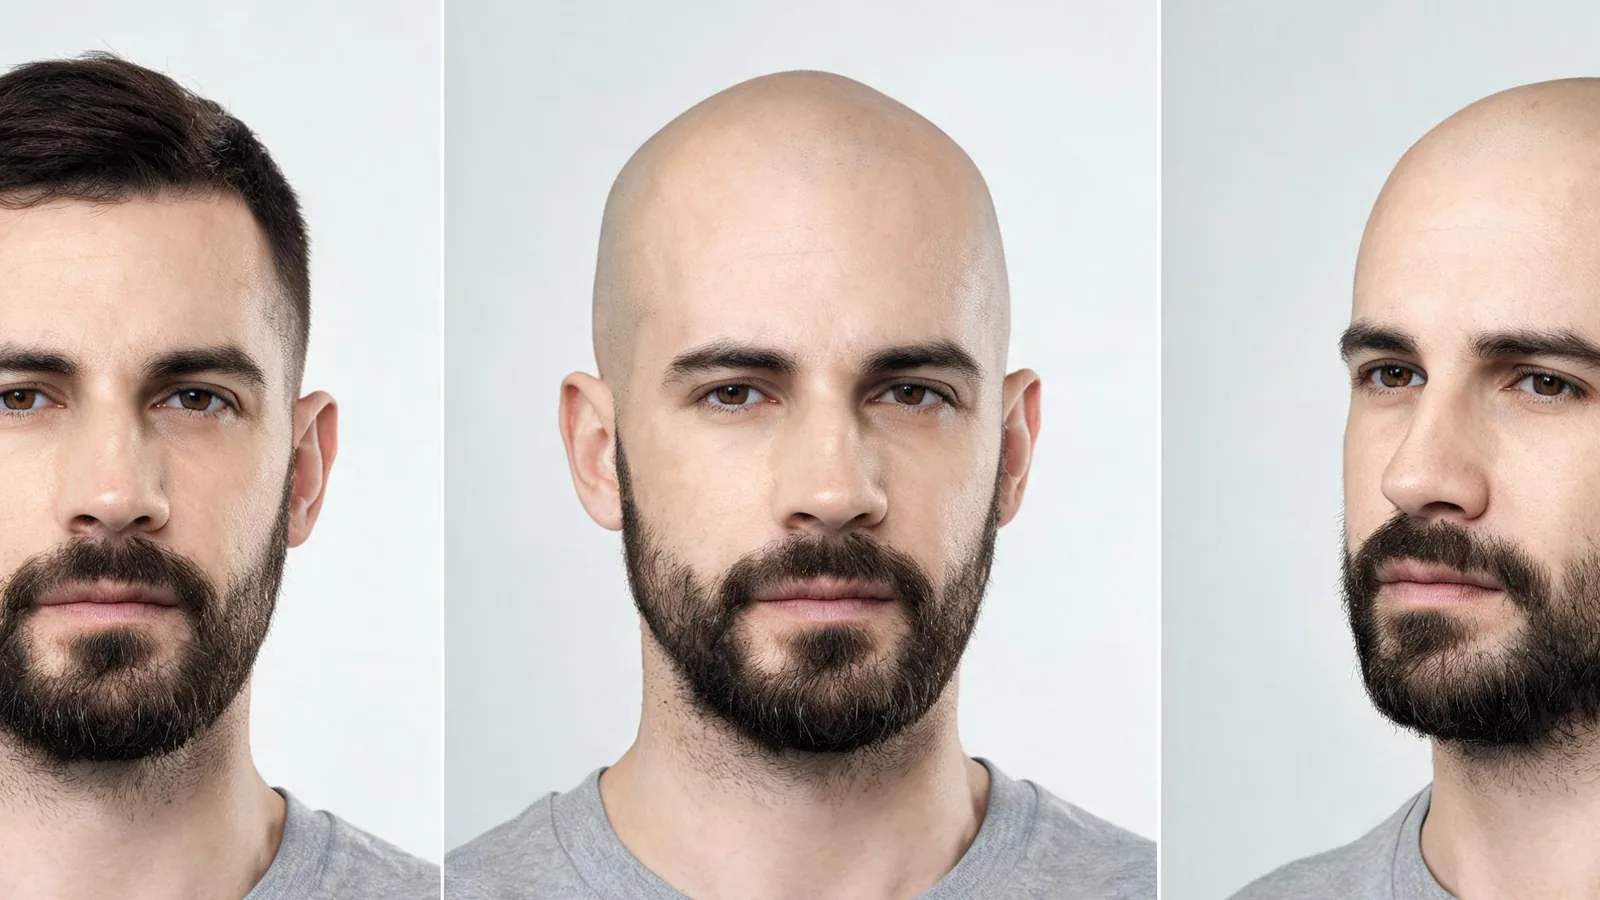
An AI bald filter video needs either a live camera effect that records your movement or an editor that accepts existing footage. Check that distinction first, then test head turns, ears, scalp edges, and beard preservation. The AI hairstyle changer creates a still-photo reference; it does not generate a bald video or reveal your exact hidden scalp.
Last updated: October 11, 2026 · ~7 min read
A convincing first frame is only one part of a usable clip. The effect must also stay attached as you move, avoid painting over your beard, and survive export. This guide gives you a short test to run before recording the whole thing.
AIChangeHair publishes this guide and offers the photo editor linked below. The hero is an illustrative appearance comparison, not a recording of a real shave or proof of a particular app's output. Effect availability and controls can vary by device and app version.
Do you need a live bald effect or an existing-video edit?
Start with what you already have. If you can film a new selfie, a live effect lets you judge the result while recording. If you need to alter a saved interview, performance, or other clip, you need an import-and-edit workflow. Those are separate requirements.
A still-photo tool is a third option. It can help you decide whether to preview a smooth scalp or very short hair, but putting that image into a slideshow does not turn it into hair removal tracked across the original footage.
| Your starting point | Capability to look for | First check |
|---|---|---|
| You can record a new selfie | Bald camera effect with video capture | Does the effect remain active while recording? |
| You already have a saved clip | Explicit video import and scalp-hair removal | Can you select the file and process a short section? |
| You want to compare your appearance | Still-photo bald preview | Can you inspect the head and face at full size? |
| You want short hair, not a smooth scalp | Buzz-cut effect or photo edit | Does visible stubble remain? |
Avoid choosing an app solely because a tutorial calls its output a “bald video.” The demonstration may be a photo reveal, an animation of a generated portrait, or a new camera recording. Look for the exact input and output you need.
A live effect is not a promise of saved-video compatibility. Confirm import support before paying for an editor or rebuilding your project around it.
Which official bald camera route can you check?
As of October 11, 2026, Snapchat has an official Bald Filter Lens listing. Its Lens support guide describes selecting a Lens in the camera and using the capture button to make a Snap. Open the listing in the app and check how the effect behaves on your device before planning a recording around it.
These official pages support checking a camera Lens. They do not establish that this specific effect can be applied to every imported video, or that it will behave identically on every phone. If your requirement is a saved clip, look for explicit import support in the selected tool and test it directly.
Use the creator and listing link to identify the effect rather than relying on a similar name. Community effects can add extra changes, such as eyebrows, facial distortion, or accessories. Start with a scalp-only result if you want to judge hair removal separately.
How do you test a bald video effect in three steps?
- Choose the correct workflow. Open the effect in its live camera, or import a short copy of your existing clip into a video editor that supports the edit. Keep the original file untouched.
- Record or process a brief test. Face forward, turn slowly to each side, return to the center, and briefly move a hand near the temple. Keep the crown and ears inside the frame.
- Export and review the saved clip. Watch once at normal speed, then pause at the turns and hand movement. Compare the beard, face, and head outline with the original before making a longer recording.
The movement sequence matters more than a particular duration. Include the kinds of motion your final shot will contain. A seated front-facing clip does not need the same test as a walking shot with repeated profile turns.
If the tool offers several edits at once, disable unrelated face changes where possible. Otherwise you may mistake a narrower jaw or smoother skin for the effect of removing hair.
What should you inspect around the scalp and ears?
Look at the silhouette first. The scalp boundary should follow the head through the turn rather than wobble independently. Pause when each ear becomes visible; that is where hair, skin, and background can overlap in a difficult edge.
Then check the forehead and temples. A leftover strip of hair, an uneven dark patch, or a painted-looking border may be easy to miss in a small preview. Review at the size your audience will watch, and enlarge a few frames to identify the cause.
Do not expect the generated crown to reveal anatomy hidden under your hair. Even a smooth, stable outline is an estimate. Volume from curls, a high hairstyle, or a fringe can leave especially little information about the scalp beneath it.
| Area or movement | Warning sign | Next attempt |
|---|---|---|
| Forehead boundary | Hairline appears and disappears | Use even front light and a slower turn |
| Ear during a turn | Ear is blurred, stretched, or covered | Keep the ear visible and reduce extreme angles |
| Crown | Head outline changes between frames | Leave headroom and avoid abrupt movement |
| Hand at temple | Fingers or nearby scalp smear | Remove the obstruction or simplify the shot |
| Background beside head | Wall or objects bend with the effect | Try a plainer background |
| Beard and sideburns | Cheek line changes unexpectedly | Choose scalp-only removal and recheck the original |
These are inspection criteria, not guaranteed fixes. If a clean input still produces unstable edges, changing the effect may be more useful than repeating the same recording.
How do you keep your beard while removing scalp hair?
Decide where scalp hair ends and facial hair begins. Sideburns connect the two, so the boundary can be ambiguous even when the beard itself is clear. Look at both cheeks, the moustache, and the jawline after the edit.
For a tool with text instructions, ask for scalp-hair removal with the current beard and eyebrows unchanged. For a preset camera effect, there may be no such control. In that case, judge its behavior from the test rather than assuming preservation from the name.
A bald filter photo preview can give you a separate reference for this decision. Upload one clear portrait and request a smooth shaved scalp while retaining the beard. Generation requires sign-in and available credits. Compare the resulting facial details with the original; preservation instructions guide the edit but do not guarantee identical pixels.
If you are considering keeping short hair, compare a buzz cut filter reference too. A smooth scalp and a closely cropped cut have different outlines and different contrast against facial hair. Choose the look you intend before judging a video effect against it.
How should you film a cleaner test clip?
Place the camera around eye level and keep it still. Use soft light from in front or slightly to one side. A harsh shadow across the forehead makes it harder to distinguish a remaining hairline from ordinary shading.
Leave room above the crown and beside the ears. A tight crop may look tidy before the effect, yet give you no space to inspect the new scalp boundary. Remove hats and avoid hair accessories for the first test.
Begin against a simple background with one person in frame. Save the busy background or second subject for a later test if your final shot needs them. This makes it easier to determine whether a failure comes from the effect itself or from a difficult scene.
Move deliberately rather than freezing in place. A motionless selfie can hide tracking problems. At the same time, an extreme whip turn adds blur that does not help you evaluate a simple talking-head clip.
If you are editing existing footage, choose a section containing both an easy front view and the hardest head turn. A test on the easiest moment alone can give false confidence about the rest of the recording.
What if the effect works in preview but fails in the saved video?
Judge the exported file, not only the camera screen. Reopen it outside the editor and watch the entire test. Check that the effect stays active, the clip is not unexpectedly cropped, and speech still matches the mouth movement.
Keep a clean original and a separate edited copy. If your app offers export settings, confirm them before committing to a long project. Do not assume that a preview, trial, or subscription includes the output size or save option you need.
If the saved result is unstable, repeat one change at a time: slower movement, simpler background, softer light, or another effect. Changing all of them together makes it difficult to learn which adjustment helped.
A still image that passes inspection can be useful for choosing a look even if the video test fails. Our bald vs buzz-cut guide helps separate those appearance choices. It cannot establish how a video editor tracks either look.
When is a photo preview the more useful answer?
Use a photo when your main question is “Would I like this look?” rather than “How do I make this recording?” A front portrait gives you time to compare the scalp, eyebrows, beard, and overall outline without distracting movement.
Use video when movement itself is the goal: a short social clip, a reaction, or a shot that needs to show different angles. A photo editor cannot supply those frames faithfully from a single input.
For a haircut decision, bring the original photo and a clearly labeled illustrative preview to a barber if helpful. Discuss the desired finish and maintenance rather than treating the generated scalp as a prediction. For a social post, disclose the effect when the context might otherwise suggest a real shave.
Frequently asked questions
Can I put a bald filter on a video I already recorded?
Only if the selected editor or effect explicitly supports imported video. A bald effect available in a live camera does not establish that it can process a saved clip. Test a short copy before editing the full recording.
Does AIChangeHair make bald videos?
No. AIChangeHair edits a still photo. You can use its bald filter to make a reference image, but it does not remove scalp hair from a video or provide a live camera effect.
Why does my bald filter flicker when I turn my head?
A turn can expose different hair and ear boundaries, motion blur, or an obstruction. Try slower movement, even lighting, and more space around the head. If the edge still jumps, use a simpler shot or a different effect.
Will a bald filter show my exact head shape?
No. Hair hides parts of the scalp, so the effect estimates what belongs there. Use the result as an appearance preview rather than an exact reconstruction of your scalp.
Related guides
Try the AI hairstyle changer →
- Bald filter: preview scalp-hair removal
- Buzz cut filter: compare short hair
- Bald vs buzz cut
- Save a bald preview on iPhone
Try a still-photo reference
Before filming, compare one clear portrait with a bald preview and keep the original beside it.