
Highlights Filter: A Preview Quality Checklist Before You Dye
Use this highlights filter quality checklist to assess roots, placement, texture, and identity before you take a generated preview to a color appointment.

A highlights filter preview is worth saving only if it preserves your face, haircut, texture, light, and background while making the highlight placement easy to inspect. After you generate a direction with the AI hair color changer, compare it directly with the original: check the roots, face-framing pieces, balance from left to right, and whether the brightness follows real hair. The goal is a clear salon reference, not a promise of an exact dye result.
Last updated: September 18, 2026 · about 7 min read
What does this checklist add after a highlights preview?
The original highlights filter guide helps you decide what to generate: face-framing brightness, a soft blend, or stronger contrast. This companion answers a different question: once you have a preview, is it good enough to use as a reference?
That distinction matters. A flattering generated image can still be a poor color brief if it changes your face, turns your hair into a flat helmet, or puts bright pieces in places that do not connect to your part or visible lengths.
| Check | A useful preview | A preview to rerun |
|---|---|---|
| Identity | Same face, haircut, and proportions as the original | Altered features, new makeup, or a different hair length |
| Roots | Soft, plausible transition that follows the part | A hard stripe, floating light band, or erased part |
| Placement | Brightness sits where you can point to it | Random patches with no connection to the visible hair |
| Texture | Highlights follow waves, curls, or straight strands | Hair becomes uniformly smooth or block-colored |
| Comparison | Original and one controlled variation are visible | Several dramatic changes that cannot be compared |
If you cannot say what changed in one sentence—“I like the lighter pieces just around my face”—the image is not yet a useful reference.
The five-point highlights filter quality checklist
1. Keep the original beside the preview
Begin with the unedited image. Look for changes that have nothing to do with color: different eyes, skin smoothing, altered face shape, a new haircut, or a different background. Those changes can make a result feel more attractive while hiding whether the highlights themselves work.
Use a clear, recent portrait in even daylight, with your part, hairline, and visible lengths in frame. If the source has heavy shadows, a hat, or hair covering most of one side, the filter has less information for a balanced result.
2. Inspect the roots before the ends
The root area tells you whether a generated direction can be explained at a consultation. Look at the part and the first inch or two of visible hair. Do the lighter pieces start softly, or do they appear as a solid bright cap? Does the result preserve your natural root depth, or does it erase the transition entirely?
You do not need the image to imitate a specific technique perfectly. You need it to show whether you prefer a softer start, a more visible face frame, or a brighter overall contrast. Write that preference down in plain language.
3. Check both sides and the front pieces
Face-framing highlights often get your attention first, so look at each side of the face separately. Ask whether the placement feels balanced with your part and whether the brightness begins at a believable point. One side does not need to mirror the other exactly, but a single unexplained bright stripe or a patch that ignores the rest of the hair is a reason to rerun the preview.
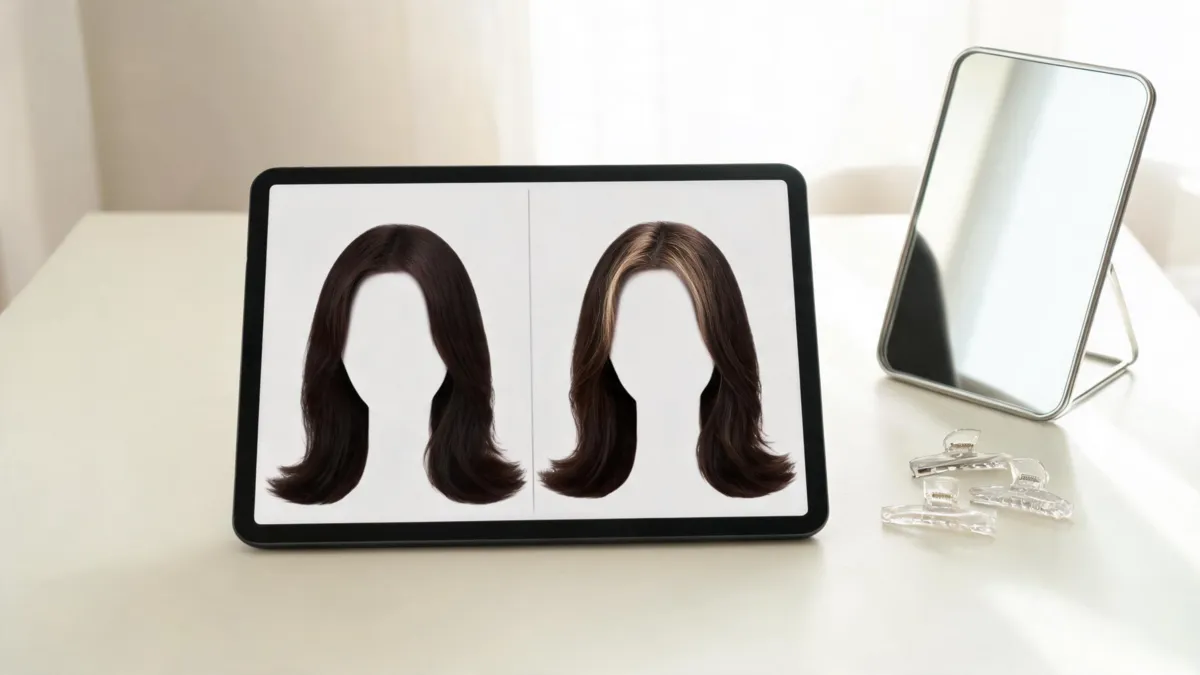
A usable comparison preserves the same hairstyle and makes the placement difference easy to name.
4. Make sure texture survived the edit
Straight, wavy, curly, and coily hair reflect color differently. Check whether the highlights follow the strands you can see in the original. If waves become smooth ribbons, curls disappear, or the result makes every section the same shade, do not use it to decide a technical color service.
Keep the request narrow when you retry: “add soft face-framing highlights; preserve my face, haircut, length, texture, part, lighting, clothing, and background.” The AI hair color changer is most informative when color is the only changed variable.
5. Turn the favorite into a one-sentence brief
Save one or two images, not a large gallery. Under each one, note the specific element that you prefer:
- “I like the soft brightness around the front, but I do not want a pale root.”
- “I want this amount of contrast through the mid-lengths, not brighter ends.”
- “I prefer this warmer direction, while keeping the visible dimension in my natural texture.”
That is a stronger starting point than asking a stylist to copy a pixel-for-pixel edited picture. It makes the aesthetic preference clear while leaving technical choices to the person who can see your hair in real life.
What to bring to a color appointment
Bring your untouched original, one favorite preview, and at most one close alternative. Mention current or previous dye, bleach, toners, box color, sensitivity, damage, gray coverage, and how much maintenance you want. The earlier highlights filter guide can help you name the direction—face-framing, soft dimensional, or higher contrast—before you add this quality check.
A visual filter cannot assess formula, processing, lift, or how your hair will respond to a service. The U.S. Food and Drug Administration advises following the product directions and doing a patch test before every use of hair dye. That safety step is separate from a screen preview.
When to rerun instead of saving
Rerun the image if it gives you a new face, changes the length or cut, puts color on the skin, hides the root area, or turns the hair into a single shiny block. Do not try to rescue it by treating a pretty result as evidence. Return to the same original photo, use even light, and ask for one smaller change.
The American Academy of Dermatology notes that coloring can damage hair and recommends following product instructions; its coloring and perming tips are useful when you are weighing a large lightening change. A good preview can make a salon conversation more precise, but it should never make the risk or upkeep disappear.
Editorial disclosure: AIChangeHair provides visual previews only. It does not evaluate hair condition, establish a dye formula, or guarantee that a real color service will match a generated image.
Frequently asked questions
How do I know whether a highlights filter preview is believable?
Check that the face, haircut, texture, lighting, and background match the original, then inspect the root transition, placement on both sides, and whether the lightness follows visible strands instead of forming flat bands. A preview is useful when it changes the highlight direction without changing the person.
Can I show an AI highlights preview to a stylist?
Yes. Bring the original photo and one or two controlled previews, then explain what you like about the brightness, placement, and contrast. A stylist can assess hair history, condition, technique, and maintenance, which an image cannot determine.
Why do highlights look uneven in a generated preview?
Uneven or floating placement can come from an unclear source photo, strong shadows, hair covering the part, or the generation changing more than color. Retake the source image in even light and ask for one restrained highlight direction while preserving the rest of the image.
Can a highlights filter predict bleach results?
No. It can show a visual direction, not a bleach or formula outcome. Previous dye, porosity, natural base, gray coverage, processing, and hair condition all affect what can be achieved and how it will wear.
Related guides
- Try the free AI hairstyle changer →
- AI hair color changer
- Highlights filter: preview highlights before dyeing
- Balayage vs ombre vs highlights
- Hair color for skin tone
Generate the direction first, then keep only the preview that lets you describe placement, contrast, and root softness without asking an image to make a chemical promise.